In Armored Warfare Global Operations is one of the three primary game-modes, along with PvP and PvE. In GLOPS, players take control of a vehicle and fight alongside other players against an opposing team, and AI-controlled vehicles in a contest to gain control of various Capture Zones, located on the map. (Capture the Flag)
Global Operations is presently available for vehicles of Tiers 5-10.
Basics
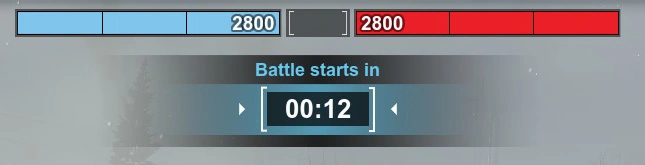
Reduce the enemy's tickes to zero to win. On Roughneck map, teams start with 2800 Tickets
Global Operations is a gamemode where teams of up to thirty players (10 or 15 per team) battle one another, for strategic control of the map.
Each team starts the match with a pool of Tickets. Taking and holding objectives (Capture Zones) referred to as "Capping", or destroying enemy vehicles, causes the enemy Ticket pool to decrease. The match ends when one team's Ticket pool reaches zero, or after up to 15 minutes.
Vehicles respawn after destruction, in the base areas of each team after a short period of time, and can then rejoin the battle. Capture Objectives change location, at various times during the match. Various Wildcard Objectives can launch drones to spot enemy vehicles, activate missile-firing pillboxes & attack aircraft to damage the enemy directly. GLOPS battles take place on one of several maps, listed below.
Differences from standard PvP
- Players respawn in GLOPS
- Capping, and the points gained from holding Capture Zones, is the decisive factor in who wins the match
- The match cannot be won by eliminating all enemy vehicles
- Maps are larger, and some maps are GLOPS-only
- Wildcard Objectives
- Capture objectives & Wildcards change location, in-match
- GLOPS has AI-controlled tanks, hostile to both player-teams, on some maps.
- Players can repair & rearm their vehicles in-match, in Supply Zones.
Capture Zones
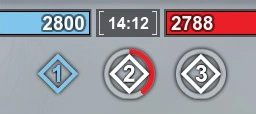
Blue team have captured Zone 1, Red team are presently capping Zone 2, Zone 3 is still un-captured
Capture Zones are marked by a white circle on the ground. A team captures a zone by players remaining in the circle, while a timer counts down to zero. When the timer reaches zero, the circle turns blue if captured by the friendly team, and red if captured by the enemy.
Once a team has control of a Cap zone, the enemy's Ticket pool starts to decrease, and the enemy will continue to lose tickets, until enemy vehicles enter the zone, it is captured by the enemy team, or the game ends.
Captured Zones remain captured, and friendly forces can leave the circle, and attack other objectives, without penalty. However as soon as the enemy enters the Cap circle, enemy Ticket loss stops, and the enemy starts to Capture it.

Cap Zones at the beginning of a battle: Roughneck map
Interupting Capture
Capturing a zone can be interrupted, by:
- Friendly vehicles in the Cap Circle taking damage, the cap timer is then reset.
- Enemy forces also physically entering the Cap Circle, the cap timer then stops until one team remains, see below.
Both Teams in the Capture Zone
If vehicles from both teams are sitting in a cap circle, no team gets the Tickets from the zone, and no team can capture the zone until it is clear of enemy vehicles.
Wildcards
Wildcard Objectives allow you to place an effect on the map to damage or harass enemy vehicles.
Wildcards are activated in the same way as Capture Zones: sitting in a circle drawn on the ground, until the timer counts down to zero. Wildcards are marked on the map by different icons, depending on the type of Wildcard.
Types of Wildcard
There are presently 7 types of Wildcard Objectives:
- Pillbox: Fires ATGMs at enemy vehicles in range
- Drone: Spots enemy vehicles
- Bomber: B2 Stealth Bomber / Rockwell B-1 Lancer
- AC-130: 'Spooky' ground attack plane
- Attack Helicopter: Spots and shoots enemy vehicles
- Artillery (AI Controlled): Fires shells at spotted enemy vehicles
- Supply Zone: Repair and re-supply your vehicle
Depoying Wildcard Effects (Press Q)
The Wildcard effect: pillboxes, bomber etc. can then be deployed to a player-chosen area, by pressing 'Q', and clicking on a pop-up map. Wildcards are 'used up' when captured, and disappear from the map, with the exception of Supply Zones. You have a fixed time to deploy Wildcard effects, use them as soon as possible, or they disappear.
Pillbox
When deployed, Pillboxes fire ATGMs at vehicles of the opposing team. They remain in-game for a minute or two, or until destroyed. Pillboxes will also spot vehicles that come within range, as well as shooting them. Pillboxes are available on all GLOPS maps. Click on one of the white 'Pillbox' icons on the pop-up map to deploy them (see below).
Tips
Pillboxes can be placed to overlook a weakly defended Cap Zone, block an important approach road, or even behind enemy forces.
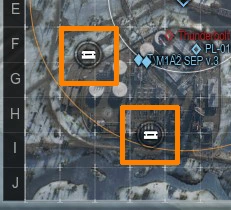  Pillbox Activation Zones |
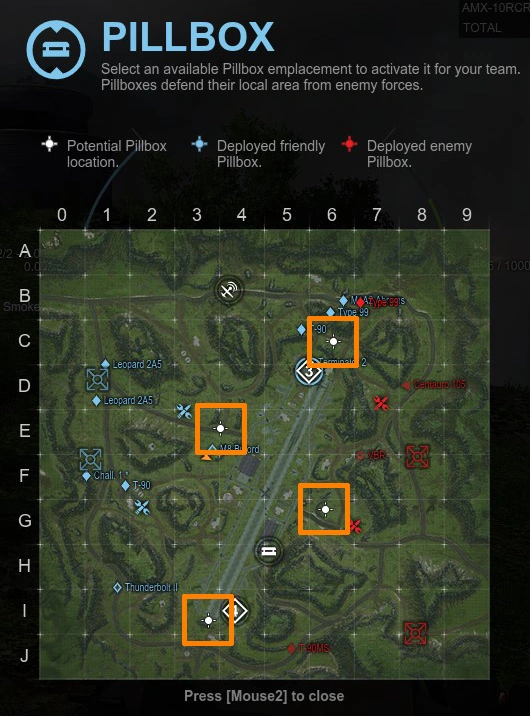  Deploying Pillboxes |
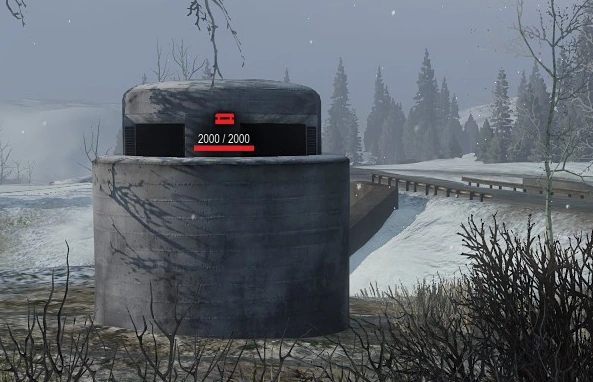  Pillbox: Careful, those AGTMs hit hard! |
Drone (UAV)
When activated, drones circle their deployment point, spotting all enemy vehicles they can see. The drone is a small UAV (Unmanned Aerial Vehicle) with no weapons. Drones can be shot down, sometimes with difficulty, due to their small size, but it is often a good idea to do so. Click on one of the white 'Plane' icons on the pop-up map to deploy it. (see below)
Tips
The drone is lethal to light vehicles: camping TDs and AFVs in bushes will be instantly spotted, and will have to retreat to hard cover to avoid being killed by enemy fire. Bushes normally only cover you from the front, not from above, where the drone is.
 Drone Activation Zone |
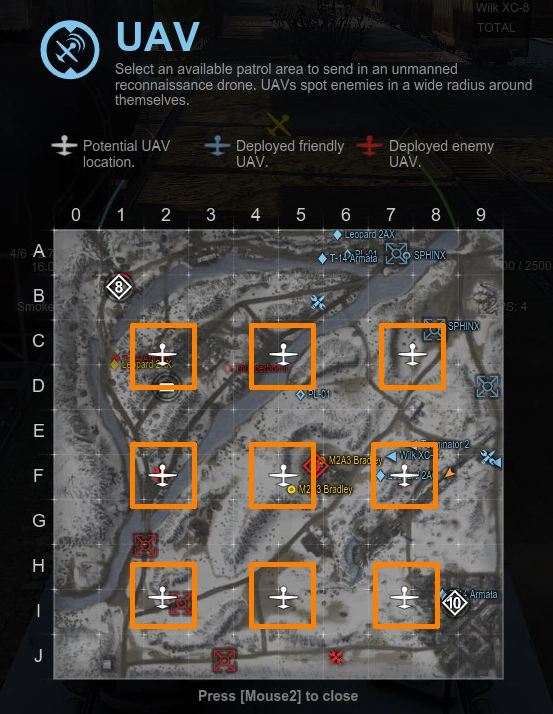  Deploying a Drone |
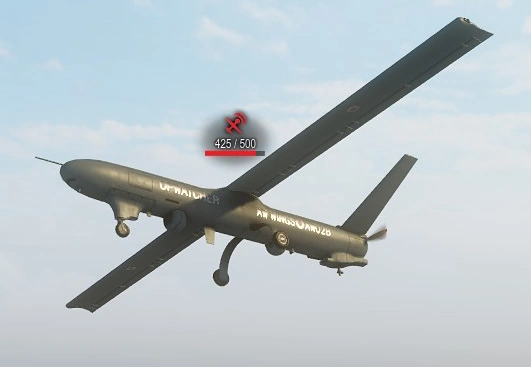  Drone: spotting everything in a wide area |
Bomber (Airstrike)
When activated, a bomber (on Roughneck map a B2 Stealth bomber) flies across the map, dropping a stick of bombs in a player designated area. Friendlies in the path of the bomb-run when it arrives, will also be damaged! A siren sounds, and if you are a friendly vehicle, an on-screen warning is given if you are in the path of a bomb-run.
To deploy the Bomber: click once, anywhere on the popup-map, then drag the bomb-path indicator out, in the direction you want; clicking again will fix the path & start the bomb-run (See below). Sit back and enjoy the fireworks.
The Bomber cannot be destroyed, and disappears after delivering its payload.
Tips
The kill-zone of the bomber is larger than shown on the map, make sure friendlies are safe!
Damage and kills from the bomber, count towards your final match total.
 Bomber Activation Zone |
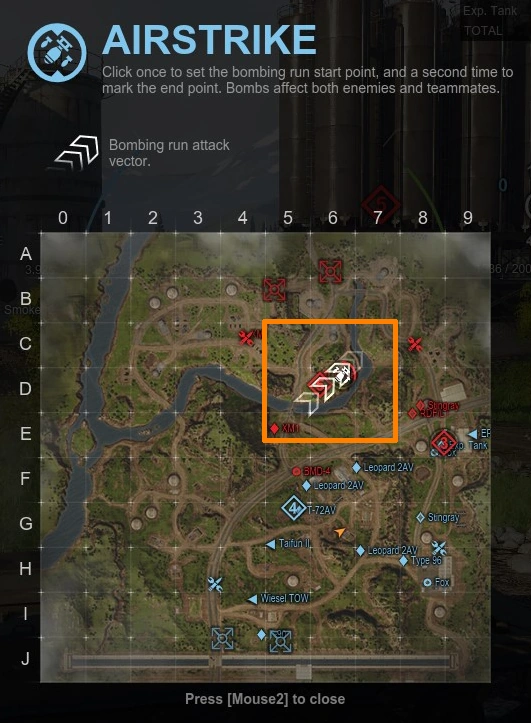  Deploying the Bomber |
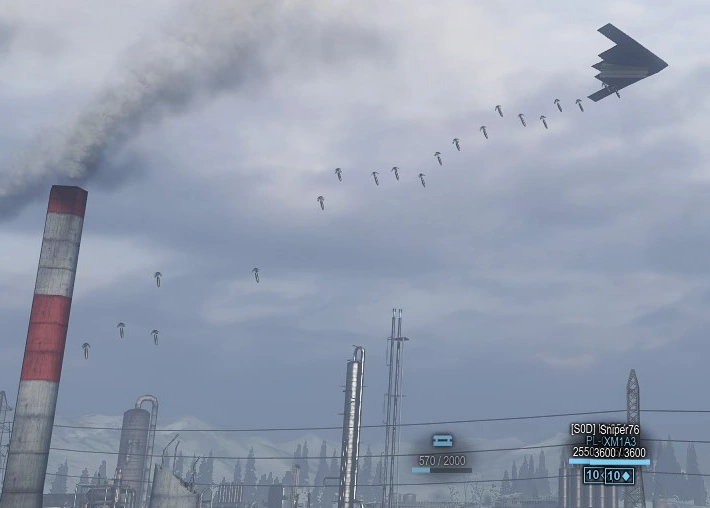  Bomber: the B2 stealth bomber ... bombing |
AC-130
When activated, the AC-130 circles the map spotting, and shooting enemy vehicles. Lightly armoured vehicles can easily be destroyed by the AC-130. The AC-130 can be shot down, and is a slow-moving and relatively easy target, but has a large HP total. Click the white 'Plane' icon on the pop-up map to deploy it (see below). The AC-130 is available on Roughneck & Waterway maps. [Wikipedia entry for the AC-130]
Tips
After capping, getting the AC-130 should be the number one priority once the Zone spawns. Shooting it down, should be done as quickly as possible if it is used against you.
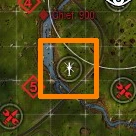
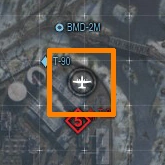 AC-130 Activation Zone |
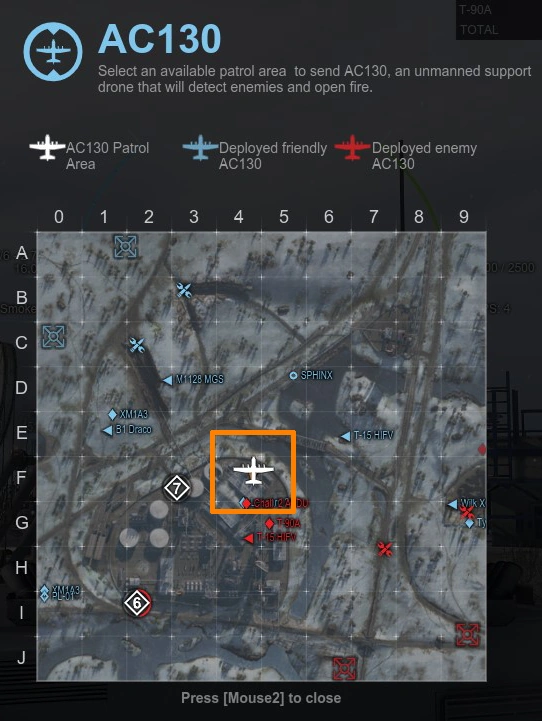  Deploying the AC-130 |
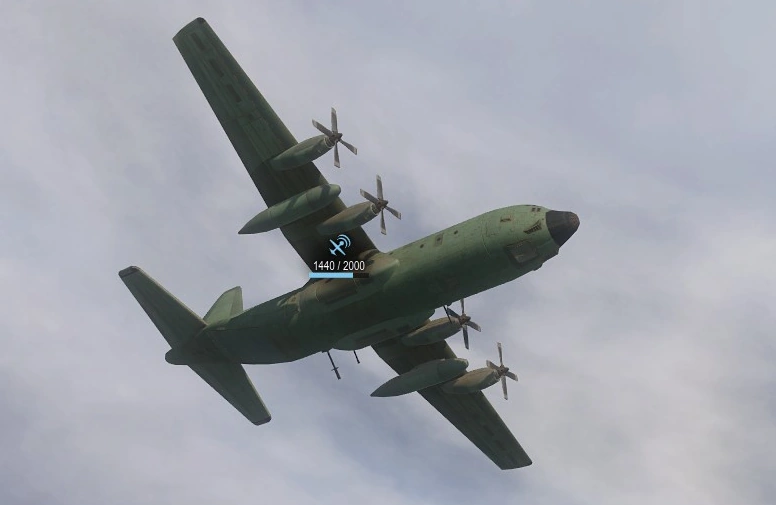  AC-130: Just run. |
Attack Helicopter
When activated, the Attack Helicopter circles the map, spotting and shooting missiles at enemy vehicles, in roughly the same way as the AC-130. The Attack Helicopter can be shot down relatively easily; being a slow-moving target, with a low HP pool. It does however, have a very large spotting radius.
Click the white 'helicopter' icon on the pop-up map to deploy it.
The Attack Helicopter is available on the Grindelwald map.
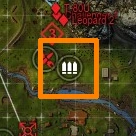
 Attack-helicopter Activation Zone |
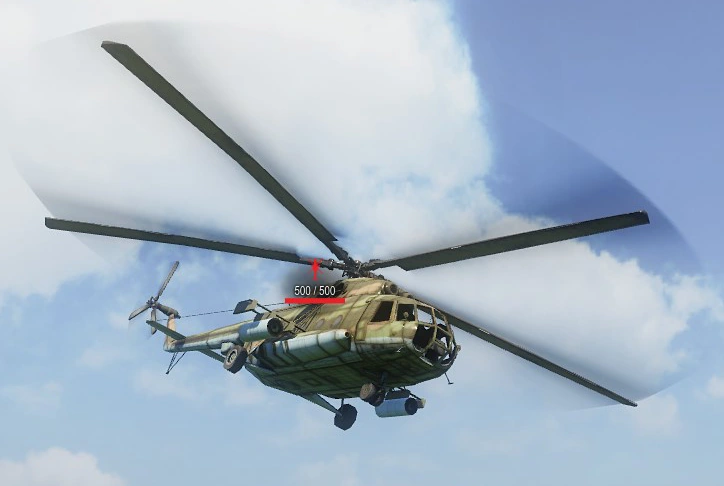  Attack helicopter |
Artillery
The Artillery wildcard is activated by capturing an Ammunition Zone and then carrying the ammunition back to your home base. When this happens, AI-controlled Artillery will appear on the map and begin shelling spotted enemy vehicles. Arty will attack vehicles that are capping, as a first priority.
Artillery is available on the Grindelwald map.
 Arty ammo zone |
  Deployed Wildcard Arty. |
Supply Zone

Supply Zones: free health here.
After sitting in the Supply Zone until the timer counts down, the player's vehicles is repaired, and fully resupplied with ammo, automatically, at no cost. Supply zones do not need to be deployed like other Wildcards.
Ammo loadout is the same as loaded at the start of the match. All broken modules are repaired, and most if not all HP regained. Consumables that have been used by the player: e.g. Medical kits and Auto-fire extinguishers, are also replaced, but the player is charged for these at the end of the match, as normal.
The Blue Supply zones can only be used by the Blue Team, and Red Supply Zones can only be used by the Red Team.
Supply Zones are available on all GLOPS maps.
Match Phases & Changing Objectives
In Global Operation, the map objectives (Cap Zones, Wildcards etc.) change position, number, and type, during the match. This happens when one teams' points bar drops below one of the thin black dividing lines on the points bar, at the top of ther screen. This usually happens at around 5 minutes, and a second time, at around 10 minutes into the match, i.e. Objectives usually have a total of three locations: start, middle, and end.
The objectives disappear from their initial position and a new set of objectives appears somewhere else on the map. The number and type of Objectives can also change.
For example: on Roughneck, the battle starts with 3 Cap Zones, after 5 minutes it changes to 2, and after 10 minutes it changes to 2 in completely different locations. Similarly the Bomber wildcard only appears late in the match. When Capture zones change position, all previously captured Zones are lost, and the new Objectives need to be captured all over again.
Tips
The locations, change times, and types of Objectives are always the same on any particular map. Knowing when, and where these location change, can assist players in getting into position early, and not spending time Capping an Objective only to find it disappears 5 seconds later.
AI-Controlled Forces
AI-controlled Vehicles
On some maps, Capture Zones have AI-controlled vehicles guarding them, that will attack players from either team. AI vehicles will not move far from their starting position and will attack any vehicle that gets too close. AI vehicles spot everyone, and relay their position to both teams.
AI vehicles do not respawn as players do: when Capture Objectives change position, new AI vehicles are spawned along with them. The AI-controlled vehicles are outlined in yellow, and appear on Barren Divide, and Desert Crossing maps.
AI-controlled Pillboxes
AI-controlled Pillboxes appear on the Waterway map. They have hit points and when the pillbox takes more damage than its HP, it is disabled for a period of time. A timer appears above the pillbox, counting down to when it will reactivate. An active pillbox will shoot any vehicle it spots, from either team. AI pillboxes cannot be permanently destroyed.
Tips
AI vehicles in between the enemy and an Objective you have captured should be left, alive and used as additional defensive forces for you.
Respawn

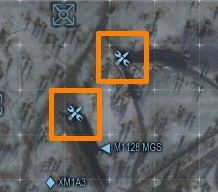
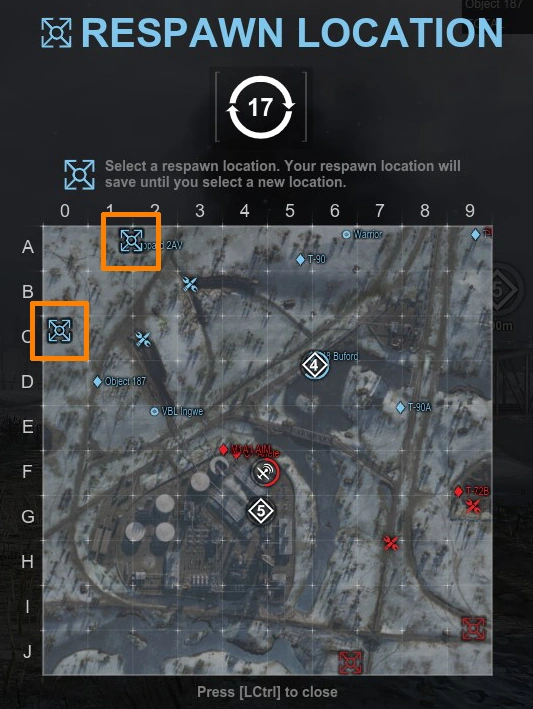
Choose a respawn point
Player vehicles respawn after being destroyed in GLOPS.
After being destroyed, players can press CTRL and click on one of several respawn points in the friendly base, to choose where to respawn next. After 25 seconds, the player respawns at that location, with a fully repaired and re-supplied vehicle. The player is immune to damage for the first 15 seconds after respawn. The player can immediately rejoin the action.
There is no limit to the number of times a player can respawn, and no cost for vehicle repair, but the team loses 25 Tickets every time a player is killed.
Tips
Choosing a new respawn point (see map) can be a convenient way of getting closer to the action, to different objectives, or to areas that have become unguarded.
Maps
Currently, Armored Warfare has 7 maps for Global Operations battles.
Tier 5-7 vehicles fight only 10 vs. 10, and these are only on 3 maps: Narrows, Roughneck, or Ghost Fields
Tier 8-10 vehicles fight both 10 vs. 10, and 15 vs. 15 battles, and these take place on the full range of Glops maps.
Some maps can have 10 or 15 player teams, some are 15 player teams only.
- Barren Divide (AI Tanks, Pillbox, Drone, Bomber, Supply Zone) 10 or 15 players
- Desert Crossing (AI Tanks, Pillbox, Drone, Bomber, Supply Zone) 15 players only
- Ghost Fields (Pillbox, Drone, Bomber, Supply Zone) 10 or 15 players
- Grindelwald (Pillbox, Drone, Attack Helicopter, Artillery, Supply Zone) 15 players only
- Narrows (Pillbox, Bomber, Supply Zone) 10 or 15 players
- Roughneck (Pillbox, AC-130, Bomber, Supply Zone) 10 or 15 players
- Waterway (AI Pillbox, Drone, Bomber, AC-130, Supply Zone) 15 players only